Tuesday, July 20, 2010

Moldmaking makes me weary...


Day seven of moldmaking...
my back hurts
my neck hurts
my arms hurt
my hands are dry and itchy
my Birkies are covered in plaster shavings

I've made a LOT of molds. Here is the tally so far:

2 Kulfi molds
2 Toot Sweet head molds (I owed Addi a head mold, one that I made before was not so good)
1 Toot Sweet body mold
2 Taboo head and tail molds
1 Taboo body mold
2 Dafydd tail molds
1 Dafydd body mold
Partial Brownie body mold
Partial Brownie head mold
Partial Brownie leg mold

One more day and I can stop doing plaster for a while, having gone through 90 pounds of #1 moldmaking plaster. Just finishing the Brownie body, head, and legs and one more Taboo will get me to my goal for this session.

Then, on Friday, I will start with the rubber mold of Little One. I am going to document the process of rubber moldmaking of Little One for a possible article in The Boat, so it will take more time since I will have to pause for photos and writing text each night.It should take about five days, depending upon the weather, since one pour of rubber has to cure for at least 12 hours before doing another one. Then I will go up to Santa Ana and pick up another 100 lb bag of plaster, and do some more plaster production molds. Another Dafydd, an Otto, another Brownie, and maybe two Little One molds should about polish off half of that bag, then we'll see.

In the meantime, here are a couple of little tips for those of you doing plaster molds. Most of which you would know... some of which you might have forgotten... you may have a better method but these work for me.

1. #1 Pottery Plaster has a mix ratio of 100% water to 150% plaster. In other words, you want one and a half times as much plaster as water, by weight. Always put the water in first. Quickly sprinkle/disburse the plaster over the surface of the water... don't dilly dally. Then, let it slack for several minutes.

2. Fresh plaster is smooth, powdery and mixes well. You can feel that it is very soft. If your plaster is grainy, or rough textured, throw it away. You're wasting your time. It won't seal well with the mold soap, and the mold will stick together and possibly risk your original.

3. Apply soap with a soft flat brush, without diluting the soap if you use some variation of PlasterLube. Smells a bit like saddle soap. Apply cleanly, don't flood near the edges, brush it on and don't foam it or agitate it. Wipe with a clean, just slightly damp natural sponge. Reapply like this, twice. Don't apply it to fresh plaster too soon... the plaster needs to set up well. Wait until the plaster has cooled, at least half an hour after pouring it. Otherwise it doesn't seal, and will stick.

4. If you have to do any scraping of the fresh plaster pour, such as removing small blemishes or cleaning up the edge along the model, then take a clean, almost dry sponge and wipe the area that you scraped. This seems to settle the particles down and makes a better seal when you hit it with soap.I didn't used to do this but I swear, it helps.

4. If you sealed the edges of your mold, so that you could remove plaster that might run around the edges and stick to the sides. scrape off the soap when you finish your mold. Sealed edges never evaporate the water from casting as well as unsealed edges. Took me a long time to figure that out. So anything that you can see from the outside when the mold is closed, should not be sealed with soap when you go to use the mold. Just scrape it with a flat metal blade, anything handy. You can tell when the soap has been scraped off.

5. Keep your sponges separate, never dip the soaping sponge (used for large areas, not for the areas nearest the model) into the water. Never dip the water sponge into the mold soap. It dilutes the mold soap, and by the end of the day the soap won't be able to seal anymore. Just as your pour your last pieces, just in time to ruin the whole mold... so watch that mold soap dilution!

6. Rub a finger tip dipped into mold soap onto your mold boards as you begin boxing up your mold. Even with acrylic or well sealed wood, the mold soap will help to release the plaster and keep your boards in good shape. Don't bother to wipe it off... just rub it on like you would grease a muffin pan (obligatory food reference)

Speaking of food... Carlsbad now has a hand dipped chocolate store. Not as good as the one in Boise, but pretty good. A piece of chocolate after a long day of moldmaking does help.

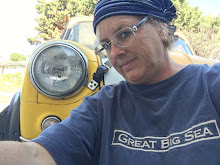
Oh, the photo above? Yasha supervising, of course. On our newly sodded back lawn.

Wednesday, July 14, 2010

Foamhenge


What does $848.00 worth of foam look like?
Funny you should ask....

I was down to TWO BOXES worth of foam last week, a frightening low supply. Though I don't do as many horses every month as I used to, still.... it's like having two boxes of Mac'n'Cheese in the cupboard. Just call me Old Mother Hubbard....

Since I'm not doing OF production now, which generally meant one horse shape produced in quantities of about 300, I can't predict what configuration the foam needs to be. Some horses are narrow and straight, some have a turn or outstretched limb, some are much smaller. So, this time I ordered blocks of foam that would completely fill a box that is either 12 x 12 x 10 or 14 x 14 x 10. Each block is either 12 x 12 x 4.75 or 14 x 14 x 4.75. That means that each horse will have a hand carved hollow in which it rests, for maximum protection-- and maximum flexibility. Surprisingly, the foam prices didn't go up as much as they could have. Each foam block is costing me approximately $5, so each horse takes about $10 worth of foam. (the smaller pieces are a little cheaper, the larger ones a little more, of course) That's only $1.00 per box more than I paid two years ago. Since the foam is a petroleum product, the pricing varies with the changes in oil costs. I won't complain about a buck!


The order is a total of 200 blocks. It will ship fifty large horses and fifty small horses. It's about all that I can store comfortably, along with the small 7 x 6 x 6 foams that I still have left over from mini production.

Today, Bob and I will store this foam up in the loft, before it gets dirty and dusty. The weather has turned warm... it's the first really warm, sunny day so far this summer! So it will be hot work, but very rewarding, like a squirrel hoarding its nuts.

I'm also making molds this week and next week. Made one and a half yesterday, with a nice long stretch of good weather and unencumbered days ahead to do what needs to be done. I'll be making the rubber mold on Kelly Savage's "Little One", for a limited production custom run. I've also made a new mold for Kristina Lucas's "Kulfi" and will be shipping it to her as soon as it is dry. There has only ever been one Kulfi mold, Kristina didn't intend to do him in production, but with our advanced techniques and knowledge, she wanted to take him out and dust him off and consider re-issuing him. Sia has been a ripping success, now Kulfi (one of the best-loved of Kristina's horses) may make a comeback! I will also have a Kulfi mold, after Kristina gets hers, and will take a VERY limited number of custom requests into consideration. I want to play with more color options that are now possible! I'm also making new molds on Dafydd, Pixie, Brownie, Taboo, and maybe Otto.

Off to work!
Joanie

Friday, July 2, 2010

Stormy Days...


(click on photos for larger image)

It's hard to be quiet about horses that turn out so well. These two Stormys, sneak peeks shown above, were finished in the last few months. The pinto was finished, actually, this morning. Still warm out of the kiln. I've really be stretching my technique on the Stormy mold, trying things that will enhance the color (as long as I can pull it off successfully) because Stormy challenges, and brings out the best in a painter. Whether resin or ceramic, Stormwatch throws down the gauntlet and tells you to GO FOR IT!!

There's another bisque Stormy sitting on the shelf, ready to go, and it will be a lot of fun to see him come to life as well.

Joanie

Thursday, June 17, 2010

Dancing with Physics


Tango... it's a dance. A fast-paced, precise and unrelenting dance. South American in origin, the genre fuels the intensity of Latin American dance and culture.

Tango... it's a sculpture by Sarah Minkiewicz-Breunig, a delightful Spanish stallion strutting his stuff in a balanced, intense yet relaxed pose.

When Tango was introduced into the Marcher Ware line, he was the third horse that Marcher Ware tackled. The first batch of pieces were cast by Mark Farmer of Alchemy Studios, and shipped to Pour Horse for glazing. A few sets of three were made... one for Sarah, one for Mark, and one for me. (You know, like parceling out Halloween candy... ) I honestly don't remember how many were made... three sets? Four? Five? No more than five, but I think that there were fewer than than. In other words, fewer than twenty total pieces. (Maybe someone will be kind and email me with a list, I'm too tired to look in back records...) When Mark headed off to some new, unknown horizon, I was left with one bisque sitting here. Unsure what to do with him, he has been sitting here ever since.

So when it became apparent that Melissa Gaulding needed our help, I immediately thought about the Tango. What better ending for Marcher Ware, what better use for a unique bisque, than to give Mel what she needs? Sarah and I donated the bisque, and I headed off to the barn to paint and glaze him.

His hooves had already been painted and fired, so a cleaning fire (to remove the dust) happened first, to the relatively low temperature of cone 010. (that would be about 1600 degrees... it sure will burn off dirt) Then the first layer of dappling was applied. At this point, the horse is white with colored hooves, and I sprayed a very thin layer of a dark brown underglaze over strategic areas to be dappled. Then a few areas of an underglaze that has more reddish tones, just like the horse that I was basing him on. Dapples were done with a typewriter eraser pencil, and the dust from dappling was removed with either a Q-tip or a soft brush, depending upon the type of dapple and location. He went into a bisque fire for the first layer to set, about 1900 degrees F. Several more layers of dappling were added, augmenting the first layer and enhancing and deepening some of the dapples. Obscuring others, as well. This technique, while very labor intensive, sets the dapples into the color and gives them a softness that can't be beat. Finally, his palomino golden over color. Yes, the palomino is sprayed *over* his already set dappling, totally obscuring it. This is the part that takes nerves and faith. By applying the palomino body color over the top of the dapples, the dapples become a natural looking part of the coat. However, too much color and the dapples disappear! That brings us to the pictures...


Why is he wet? See, on his hoof, the water drop? See the wet drops on the ground? After he was fired, I checked my work by running him quickly under the faucet and looking at how his dapples show through. Not a perfect way, but a simple way, to see how he will look when the glaze brings his colors to life. His eye is unpainted, and none of the details are done yet.

So here is where the story gets interesting. These horses, as all ceramic castings, are hollow. So there is air inside of the casting. We poke a little air hole into the casting when it is drying, so that the air can come out when it heats up in the kiln. When the Tango was pulled out of the bisque firing just before this photo was taken, I had dreamed the previous night that the horse had no air hole. Just a quick dream, nothing interesting... just the fact that he had no air hole. Sure enough, I checked him when the kiln was cool enough to touch him, and THERE WAS NO AIR HOLE. Whoever cleaned the bisque at Alchemy had forgotten to punch him one!

That's a problem.. a big scary problem. When the air inside gets hot, it builds up pressure. With no escape, the pressure is held inside of the horse body. With an earthenware casting, that air will slowly escape through pores in the clay. (Remember, earthenware is porous) It won't (probably) blow up. It won't take glaze well, however. The glaze will form craters and be very unpleasant and bumpy, because the escaping air pushes the softened glaze away from the thousands of little pores where it is escaping.

In a bone china, the clay is not porous. Once it has been fired to maturity, it is impermeable to air or water. So, with no place to escape, the pressure builds.. and builds.. and builds.

He had already been through several bisque firings. Either that was proof that he could hold the pressure, or he did have a tiny hole somewhere that I couldn't see, or he was going to blow up one of these times. What to do? What to do??!!

When I wet him down, I tried to see whether there were any tiny bubbles forming in the water layer. Nope. So I dried him with a blow dryer. One spot... one little spot.. on his rump stayed wet for a little longer than the rest. It was wet from the inside, it was holding water in the body cavity. I couldn't see the hole, but it had to be there. Otherwise there would be no reason for that spot to stay wet. But would it be big enough to mess up the glaze?

I 'candled' him, in case there was still water inside of his body, which would be even more pressurized than air. He fired for an hour at about 500 degrees, then cooled.

His details got painted.. eyes, leg chestnuts, etc... and he was sprayed with glaze. Then, into the fire for a last time, which is about 1800 degrees F. Checked him when the kiln shut off about midnight... I could still see an intact horse silhouette against the glowing orange kiln bricks.

Today, he came out of the fire just fine. No flaws on the glaze, no explosion. His pictures were taken while he was still reassuringly warm.

Now he is up at auction, at My Auction Barn, 100% to Melly. He has more of a story than most pieces do... one of the more unusual journeys that a casting has taken, here at Pour Horse.

Joanie


Sunday, June 13, 2010

Flying Heart Fundraiser


There's so darn much for sale, including FIVE DAYS AT POUR HORSE for glazing or moldmaking, that it's just easier to give you all the link:

www.flyingheart.org

GO AND SPEND $$ FOR MELLY!

Joanie

Saturday, June 12, 2010

Between a Rock and a Hard Place


There are some people in the world who give with their hearts... who brighten the cloudy days, and soothe the angry words. Who reach out and nurture. People who we can't help but love, people who make a difference.

Yet they do have their own problems, and when they ask for help, you know that they really need it. It's amazing to see how many people are coming together to help our dearest friend Melissa Gaulding.

Mel's husband has cancer, and it is crucial that they are able to pay the medical bills, to keep the care coming. When she let us know that she is desperate enough to sell her beloved collection, gathered over years, in order to pay for what Herman needs, the options were clear....

There will be a series of auctions, sales, and fund raisers for people to participate in, which will be hosted on this website:

http://www.rhiannondesign.com/Melly/

It is quickly and beautifully being put together by Heather Malone-Bogle, and there will be updates frequently, so bookmark it and keep going back. Please note: don't... I repeat DON'T... use the word 'donation' or anything like that, because paypal will shut down her account if they see it. We aren't running a scam, but they don't know that, and we can't risk causing her problems. Check it twice before you submit your payment, and thank you for your help!

There is already one auction up, for a gorgeous Ferseyn painted by the uber-talented Karen Gerhardt, you can see it here:

http://myauctionbarn.com/auction_details.php?auction_id=138643

ALL of the funds will go to Melly, and Auction Barn is waiving the auction fees! Everyone wants Melly to have the most that we can give her.

I will be working on a horse, as well.... Sarah Minkiewicz-Breunig and I own the last bisque Tango, and we have decided to donate it. I will glaze him and put him up as soon as possible on Auction Barn. 100% to Melly, of course. Other people have already pledged or donated, see the list of donors on the website, and watch it grow as our help for Melly grows!

Several of us will also be glazing tiles that have been sculpted, pressed, and fired by Sarah Minkiewicz-Breunig. Those tiles will be available as soon as they can be finished.

When we give with our hearts, we find purpose beyond our everyday existence. We find strength and resolve. Please help however you can. Every little bit makes a difference. For Mel.

Tuesday, May 18, 2010

I walked until my pants fell down... and then I walked some more


There's no denying that sitting around cleaning greenware, glazing and firing, are sedentary pursuits. Add in a love of good food, and the recipe for weight gain is complete. I've never been one to exercise, either... I prefer intellectual exercise, not physical. As I have told my Grandmother, when we drive along the coast on the way to her hair appointment... looking out at the vast array of people jogging, walking, strolling, stretching and biking along the boardwalk... "I love exercise, I could sit and watch it all day".

However, the dogs have a different idea. They love exercise... they crave it. A good long walk, a quick run, a wrestle and tumble...they glory in their young muscles, in the cool weather, and in the joy of being a spoiled dog. Life is good, for the dogs. So, they have gotten me into the habit of walking them every morning. Somehow, it has become a custom with us, we hitch up to the bike, they pull Casper and I to the park, we then put their leashes on and walk for a full hour. Casper keeps up pretty well, since the pups have already done five or six blocks of vigorous exercise and have the edge taken off. In total, we walk for between one and a half and two hours every morning. Unless it rains. Which it probably won't do again until October.

So much physical movement has begun to show the logical result... I am losing a little weight. Not too much... not enough to be in one of those annoying internet "before-and-after" pictures. But, a little. My pants fall down now. Going to need a new size soon. Yesterday, tired of having to hitch them up every few steps, I did what any reasonably female would do... I used a bungee cord for a belt. Worked like a charm. Maybe a trip to Target to get a real belt is in order?

So I posted this picture in part to show what I looked like a month ago, so that in another month or two I can post again and show some progress. Oh, and my "Yorkshire Terrier" hair is now dyed a very pleasant and natural brown. My great-Grandmother was completely white haired when she was thirty... I started greying in my 30's and now have a quite frosty head. When it's fully white, I will glory in it, but for now, the grey does not compliment. So, with a good hairdresser who has an excellent eye for color (she's like you, Lesli, but does her magic with people hair..) I look much better than shown below. I'm in my fiftieth year of existence on this Earth, and I am trying a little harder to take care of my health and looks. Guess it had to happen eventually!