Tonight I worked again on the electrical, found the short that had eluded us, fixed that, and then hooked up the fireplace. It has a circuit board off to the left, which controls three flickering lights that fit into a small acrylic fireplace insert. I can also hook up a set of 25 flickering Christmas lights to it!
I ordered a custom firebox from an Etsy vendor (Marquis Miniatures) that will hold the circuit box, and also cover the junction splice in the wall. Jill at Marquis Miniatures makes the most exquisite and detailed miniatures, and I enjoyed chatting with her today on the phone. Thank you, Jill!
Friday, March 25, 2011

Monday, March 21, 2011
A quick wallpaper peek!
The wallpaper for the living room and dining room arrived, and I've been anxious to see how it looks up. So I cut a paper mockup of the stairwell, cut it out and pasted it on. Tricky shape, and I didn't line it up perfectly, but its okay... the flaw is much less noticeable in actual life size!
The paper is by Wm. Morris, from the Art and Craft section of Brodnax Prints. Wait until you see the border! Thanks to Carrie Rouillard, asking her brother, I know for sure now that the typical 1920s living room would not have had a wallpaper border at chair height... they tended to put borders along the ceiling. They did do chair rails, of wood, sometimes with the paper above and painted below, or paneled below, but not a wallpaper border there. So, I had to order more paper... grrrr... control freak versus impatience in my head.
I LOVE it! Now to paint the ceilings and walls and be prepped for when the rest comes.
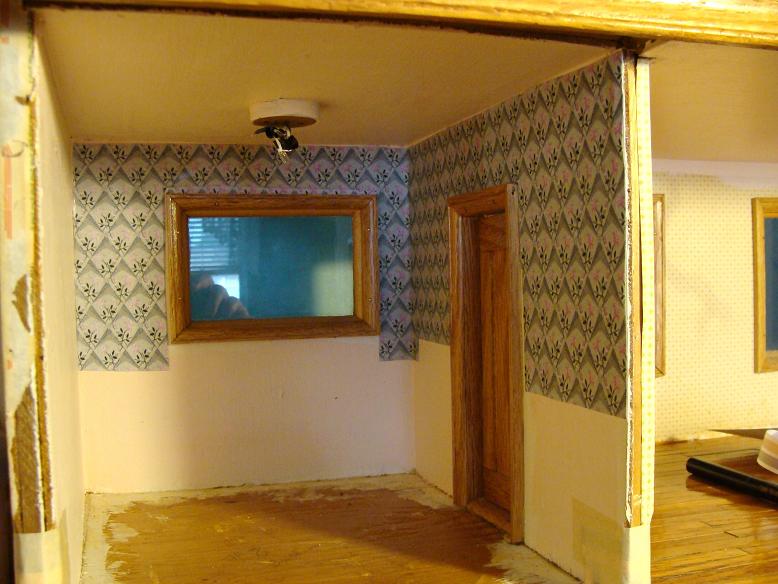
Finally, to catch up, here was today's project... the second story room that is formed by the stairway. It's sort of an odd little room, but I have big plans for it when decorating! We had always intended to have some sort of attic access from there, like a let down trap door, but I've given that up, not being able to figure out how to do it. So I cut a little piece of plywood to cover the gaping ceiling, and then painted it all. At lunchtime, I cut the paper mockups, and after starting the kiln load for today, I pasted. Fun! Wow, wouldn't it be nice if you could paper a real room in fifteen minutes? This wallpaper is also from the Wm. Morris Arts and Crafts line, called Willow.
The baseboard and crown molding will need to be stained first, to match as close as possible with the oak floor. I may wait until all of the rooms are papered, and all of the molding cut, before doing the staining. It really does take longer to set up and clean up, than to paint about twenty inches of 3/4" wood!
Now we are up to date.
The paper is by Wm. Morris, from the Art and Craft section of Brodnax Prints. Wait until you see the border! Thanks to Carrie Rouillard, asking her brother, I know for sure now that the typical 1920s living room would not have had a wallpaper border at chair height... they tended to put borders along the ceiling. They did do chair rails, of wood, sometimes with the paper above and painted below, or paneled below, but not a wallpaper border there. So, I had to order more paper... grrrr... control freak versus impatience in my head.
 |
| Before |
 |
| After! |
Finally, to catch up, here was today's project... the second story room that is formed by the stairway. It's sort of an odd little room, but I have big plans for it when decorating! We had always intended to have some sort of attic access from there, like a let down trap door, but I've given that up, not being able to figure out how to do it. So I cut a little piece of plywood to cover the gaping ceiling, and then painted it all. At lunchtime, I cut the paper mockups, and after starting the kiln load for today, I pasted. Fun! Wow, wouldn't it be nice if you could paper a real room in fifteen minutes? This wallpaper is also from the Wm. Morris Arts and Crafts line, called Willow.
 |
| Before... note the wire tape |
 |
| After, with the baseboard and molding in place but not stained yet |
Now we are up to date.
Dollhouse Bathroom a Rhapsody in Pink and Black
Since the bathroom didn't need wiring, I could go ahead and paper and tile it. Cousin Lauren printed the wallpaper from a free printable site ("Jennifers Printables") since I don't have a high quality color printer hooked up. This 1920's wallpaper is just PERFECT for the tile I have ready, there was nothing on the market that looked as delish as this did. So, after painting the ceiling of the bathroom (and the bedroom, since it will be the same color and it takes longer to wash out the paint sponge than it does to actually paint it) and letting it dry for a day, I was ready to put up the wallpaper. I spent about half an hour making plain paper mockups that fit just perfectly, with all of the overlaps. At lunchtime, I sprayed the wallpaper with Krylon Matte, as per instructions (to keep it from fading too fast), cut out and pasted it up. Using "Grandmother Stovers" wallpaper paste, made by Handley House (a dollhouse wallpaper supplier I think) it was pretty easy. Using a cheap paint sponge, you spread the paste on, making sure it is not too gloppy, and then wipe your hands. Then put up the paper, peel and adjust as needed, and flatten it out with your fingers. Not bad, not bad. Had a couple of little touch ups, that's all.
 It went very fast, since I had done the paper mockups so I knew that my wallpaper would fit perfectly. Then, the tile went up, with two sided tape. I had cut these weeks ago, while still looking for wallpaper. The black tiles are colored in with a Sharpie!
 I love this wall, it is pleasing to the eye. the toilet will go in the back corner, and a shelf will go on this side of the door. Still waiting for the flooring to come, but since there will be baseboard, it's okay to have the large gap along the bottom. Now I'm pondering about how to make a frosted window.. what can be put over the window glass to make it frosted?
 | |||
| Two walls up! |


Stolen Moments plus a weekend...
Through a combination of fascination, stubbornness, and focus, the dollhouse made a lot of progress since the last post. Up early in the morning, for an hour of prep, then at lunchtime while munching yogurt, and after dinner... then I managed to spend the whole weekend either thinking about it, painting something, measuring something, or actually installing something. Sweet! These stolen moments add up.... half an hour here, twenty minutes there... it comes together bit by bit.
Some of these pictures are dark or off color, because of the hours I am working, late at night or early in the morning, so sorry for that!
The biggest job yet facing the house was the wiring. My Grandfather wired it by running the wires through the hollow walls, which of course means no access now. I wanted to be able to add lights, including wall sconces and floor lamps, and looked into the different systems. The most versatile seemed to be Cir-Kit, with a flat tape wiring system that can be put right on to the walls and then painted or papered over. I used to work for an electrician when just out of high school, and my hubby is an electrician for the power company, but my experiences with wiring are pretty limited. Added to this, dollhouse wiring is direct current, and uses a transformer. I was hung up on the idea that I had to run a parallel system, using the transformer that came with the kit, and somehow get the tape wiring into the house by drilling or cutting a wall. It came to me, after a couple of weeks of thought (she's slow, but she does eventually get there) that **wires are wires, whether flat or round** and flat wires can be junctioned to the existing wiring and use the same transformer! (we bought a nice big one when we first started the project) So, after due deliberation, I began to tape and wire....
The light colored strip is the positive, the dark is the return (ground? neutral?) You peel the back off of the tape, press it to the walls, and then put these TEENY TINY incredibly small brads into the intersections to make the connection between the two tapes. And I do mean tiny!
There was a convenient wire coming out low in the living room, near the fireplace. So I used that one to connect to the flat wiring. I stripped the ends, and by not pulling the rubber off all the way, I could use it to twist the wires easily, then remove it.
This was the connection that would test the whole idea. (I cleaned it up later and connected more solidly) Using large brass brads, I twisted the wires to them, and then....
Success! Actually, I tested before running all of this wall wire but I didn't take a picture of it. The little test probe, included in the kit, simply sticks into the wire and lights up if it has current. This is around the doorway. It will allow me to plug wall sconces, floor lamps, Christmas lights, and anything else I want, directly into the wires, right through the wallpaper! Pretty nifty!!

Here's the attic, the place where I jumped off from to wire the top floor and second floor. So everything has wall wiring except the bathroom and kitchen. This took me all day on Saturday, sun up to sun down and a bit more. Those brads were so small, and it took four for each corner and direction change. But it is done, finally!
Some of these pictures are dark or off color, because of the hours I am working, late at night or early in the morning, so sorry for that!
 |
| Speaking of Flying Spaghetti Monsters! Yikes |
 |
| Flat wire tape being applied to the walls |
 |
| The wire from the wall, stripped, with the stripped ends used to twist the wire |
 |
| Wall wire attached to large brads, connecting to the flat wiring. Note the tiny brads in the wall wiring! |
 | |||
| Test probe lighting up |

Here's the attic, the place where I jumped off from to wire the top floor and second floor. So everything has wall wiring except the bathroom and kitchen. This took me all day on Saturday, sun up to sun down and a bit more. Those brads were so small, and it took four for each corner and direction change. But it is done, finally!
Tuesday, March 15, 2011
The kitchen is done! Well, except...
Being the first project, it feels good to have the kitchen done. Is anything ever truly done? I was hurrying at lunchtime to take these photos, and forgot to put the baseboard up, but it is cut and painted and ready to put up. Oops! Well, we can look at it later, no doubt some other fun accessories will be added to the kitchen. There's a little shelf that I want to try and make at some point. Also, I just painted the cupboard white, quickly, today. With regular acrylics, using the airbrush. (smacks forehead) It took fifteen minutes, instead of an hour. Skills, meet brain. Brain, meet skills. Get to know each other. Be friends. Keep in touch.
So, with those caveats in mind, here is the kitchen, finished at last. Note all of the fun accessories that I have been hoarding like a kid with Halloween candy. I keep them in a gorgeous wooden box with a horse tile on top, that the awesome Lynn Fraley made, which was given to me by the most gracious and sweet Liz Holm. Liz, this box is perfect for keeping those tiny treasures in, and when the dollhouse is done, the box will be filled with the beautiful jewelry that other model horse people make. It gives me joy every time I look at it.

Back to business. Remember, you can click on the photo for a larger version. You'll want to, so that you can see all the tiny fun. The curtains were the original ones that I made for it, about thirty five years ago. Guess I always pictured the kitchen in red and white...at least I am consistent! The cupboard, as noted above, is now white, but will be getting glossed (when the paint fully cures) and some black detailing. Rather than the heavy detailing I tried before, I want to use very small wooden frames to accent the doors and, on the right lower side, create the illusion of drawers. That's the potato bin but it is not something I will display potatos in, it might as well have 'drawers'. Where else do you keep your silverware?! Panning around the room, here are closer views:


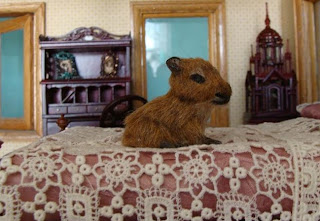
She doesn't have a name yet, maybe that is something to do tonight. She is sitting on some newspapers, she might make a mess.
Next project... the bathroom! Nice and easy. Waiting for the wallpaper and floor tile right now.
Monday, March 14, 2011
Baby Steps
Yesterday and today, there wasn't enough time to do anything useful on the dollhouse... real work comes first. So at lunchtime, I grabbed a minute to 'antique' these gold frames that I picked up at the dollhouse store. Just rubbing black paint over them, then rubbing it off, makes them look so much better! They will be used in the living room.

http://caplinrous.blogspot.com/
What an adorable beastie!

I also was able to patch the empty space above the kitchen stove, painted it to match the ceiling, so that is all done. Took a lot of fiddly carving with an exacto, to fit the little piece of thin plywood into the hole nicely.

Also, the new pet came. She's adorable, but her eyes weren't painted and she would look better with actual painted eyes. So when I get a minute, I will paint and gloss her eyes and dab a little gloss on her nose. Looking for a name...
If you haven't seen a baby capybara as a pet, check out here:
What an adorable beastie!
Saturday, March 12, 2011
The Dollhouse Project... Kitchen Dilemma
An unusual element of this dollhouse is the staircase that swoops down in front of the dining room, and takes up much of the space on the first floor. It houses the controls for the lights, but most dollhouses don't have a staircase like this. Because of it, I have less room in the kitchen. Unfortunately, the kitchen has more fun accessories than most of the other rooms... food, spices, utensils, plates, etc. I bought the little cupboard to fill this need... a place to put all of the fun elements. The cupboard (which is not finished, still needs some paint touch ups) has doors that open to reveal shelves and spice racks, and the bottom right is a potato bin. Fun! However, right now the only place to put it is in front of a window! So I am contemplating putting a wall up between the kitchen and the dining room. The wall would be at a slant, behind the cupboard in this position:

This position really opens up the kitchen, making it more roomy and allowing that window to show. The tile shows better, too! Otherwise, the kitchen will look like this:

You can see how much more crowded it is, this way. Though it does show the refrigerator off better. How cool is this refrigerator?

So I picked up a piece of craft plywood and will probably go ahead and paint and tile it. Which means another trip to the dollhouse store (boo hoo!) but I need the kitchen tile anyway. I could make the wall temporary, until I decide for sure.
What do you think?
Edit: you know, looking at these photos, I think I will repaint the cupboard white with black trim. I worked so hard on this color for it but now it is too dark. It's already white on the inside, so a couple of coats of white on the outside should brighten it right up...
Subscribe to:
Posts (Atom)